I am going to get started on a small electrical project on the boat, by small I mean a complete replacement of what is there. The system looks like it was patched together by the PO and I think it would be easier to just start over. I have looked at a lot of the posts from other members and have gotten most of my questions answered. However, I still have a few questions that I could use some clarification on. Here are my questions
1. Has anyone heard of AAA World Wide enterprises for navigation lights? There is a combo masthead deck list on ebay for $35 with shipping. That seems like a good deal, if the light is decent. Does anyone know of a better place to get lights? What have you paid for a similar masthead/decklight combo? The link is below for anyone interested
http://www.ebay.ca/itm/ws/eBayISAPI.dll ... TQ:CA:1123
2. How important is the wire that is used? Do I need to get the tinned wire or can I just pick up wire from lowes and put a wire loom around it? Some people used 16/4 SJ. I was planning on running a common ground wire for all the components in the mast and having a separate hot wire so they can each be turned on separately. If I run the 16/4 the length of the mast how did you pull the wire out for the mast head light since it isnt co-located with the all around light at the top of the mast? Did you run a separate lose wire down the length of the mast for the common ground? Does the common ground need to be wired in parallel for the individual components or can they be wired in series?
3. Last question not electrical related anyone know where to get the keel pin bracket? I was looking at some older posts from a few years ago and was just wondering if there was a current supplier that anyone was using.
Thanks for all the help. This site is a great resource for everyone.
Electric quesiton
Regarding the tinned copper wire. All production boat wiring I have ever seen used bare copper conductors. The tinned copper may help with corrosion but sealing the connections well is more important and tinned wire is sold at a high premium. try to find a good quality adhesive lined shrink tube to seal you connections and use plenty of lenght to get a good seal. You can use plain hook up wire from NAPA or an electrical supply house. 16 AWG should be fine for your connections.
Your lights would all be wired in parrellel not series.
Your lights would all be wired in parrellel not series.
-
snowbordlb
- Posts: 26
- Joined: Sat Feb 06, 2010 7:57 pm
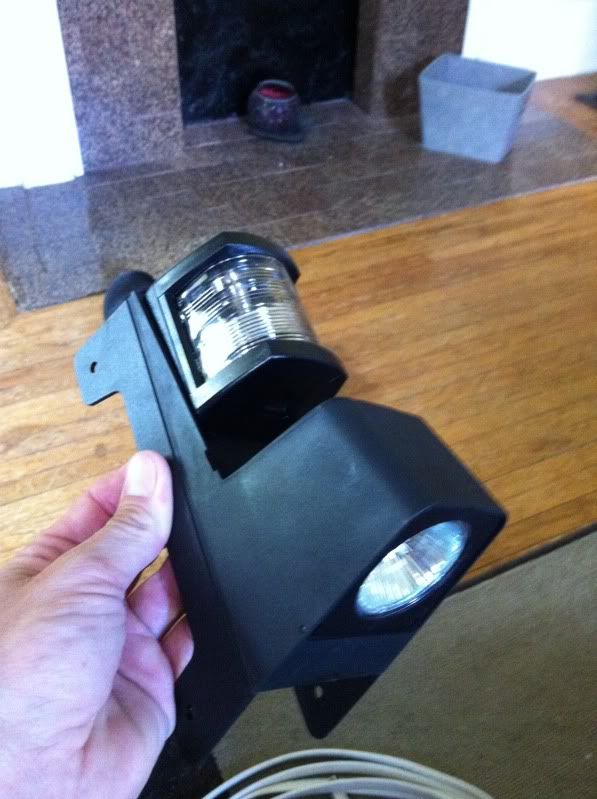
I have that exact same light and haven't mounted it yet. It comes wired so that you turn both on with one switch. That's not really a problem, rewiring it is easy.
What really bothers me is that the bosses for the screws holding the lights on protrude out the back. So it won't really fit flush against the mast. This can probably be overcome with some sort of shim, but it's a PITA that I haven't had time and patience for yet.
What really bothers me is that the bosses for the screws holding the lights on protrude out the back. So it won't really fit flush against the mast. This can probably be overcome with some sort of shim, but it's a PITA that I haven't had time and patience for yet.
Tom
1981 Endeavour 43 s/v Pearl Lee
Former 1976 Columbia Payne 9.6 s/v Gin Rhumby
Former 1979 Chrysler 26, s/v Copacetic
http://www.asswhaffleyachtclub.net
http://www.svpearllee.com
1981 Endeavour 43 s/v Pearl Lee
Former 1976 Columbia Payne 9.6 s/v Gin Rhumby
Former 1979 Chrysler 26, s/v Copacetic
http://www.asswhaffleyachtclub.net
http://www.svpearllee.com
-
dubbinchris
- Posts: 60
- Joined: Tue Oct 23, 2012 2:01 am
- Location: Columbus, OH
While not on my Chrysler I did wire the mast on the Siren 17 I traded for my Chrysler.
I used this:
http://www.jamestowndistributors.com/us ... Round+Lamp
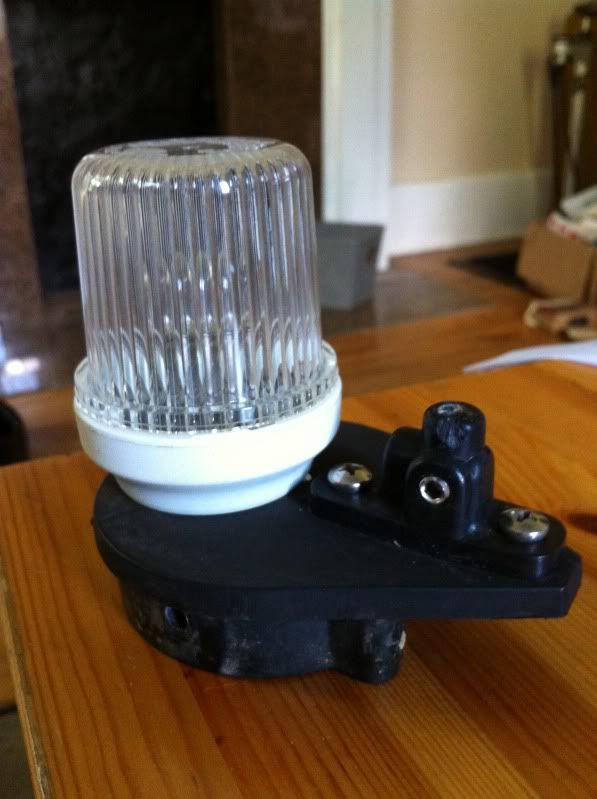
and this:
http://www.jamestowndistributors.com/us ... Combo+Lamp
I started about by getting some 16/4 in the length of the mast plus a few feet extra at each end. Then I got some 16/3 in in the lenght from the top of the mast to the point where I wanted to mount the combo light.
I put the mast on a couple of saw horses and used an old stay from a Catalina 25 to snake a string through the mast. I did have to dig out a little bit of the foam that was in the top of the mast.
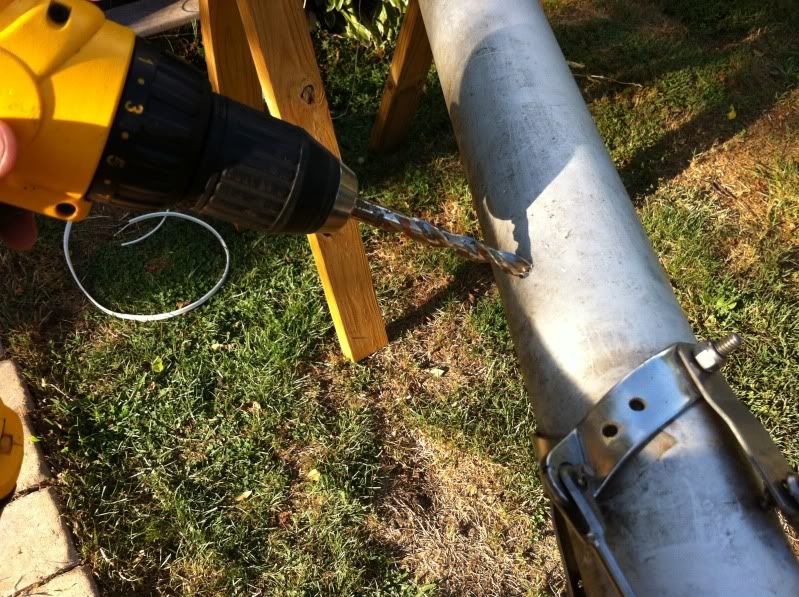
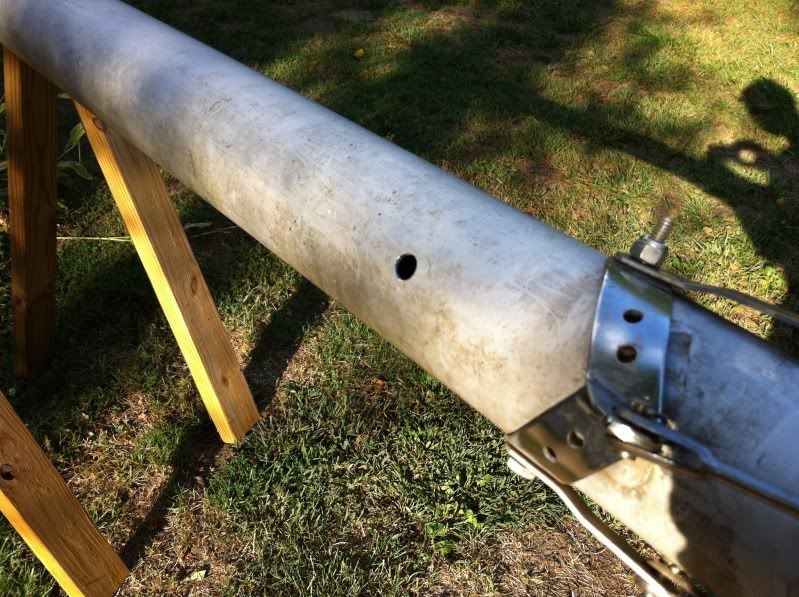
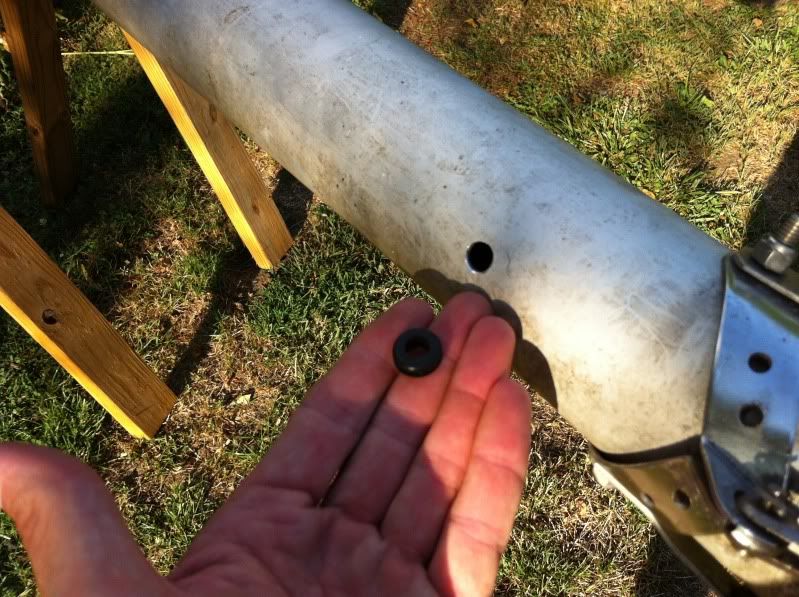
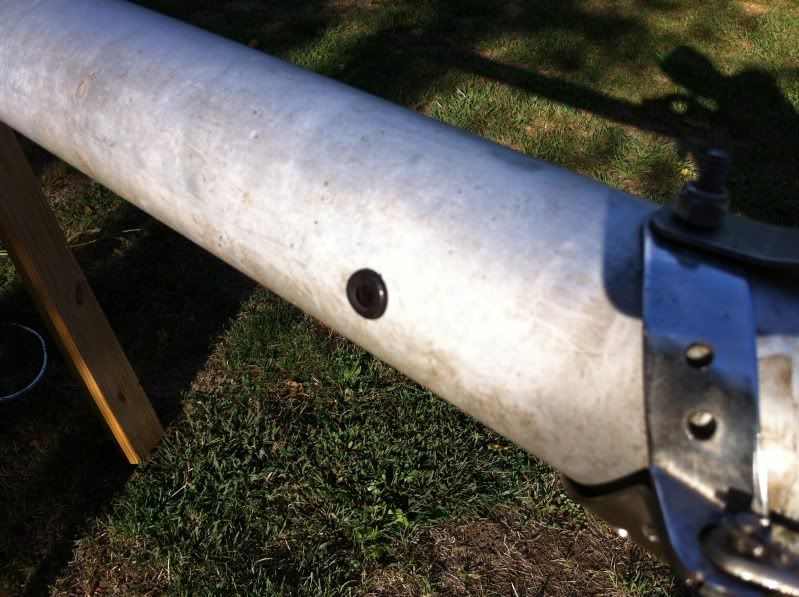
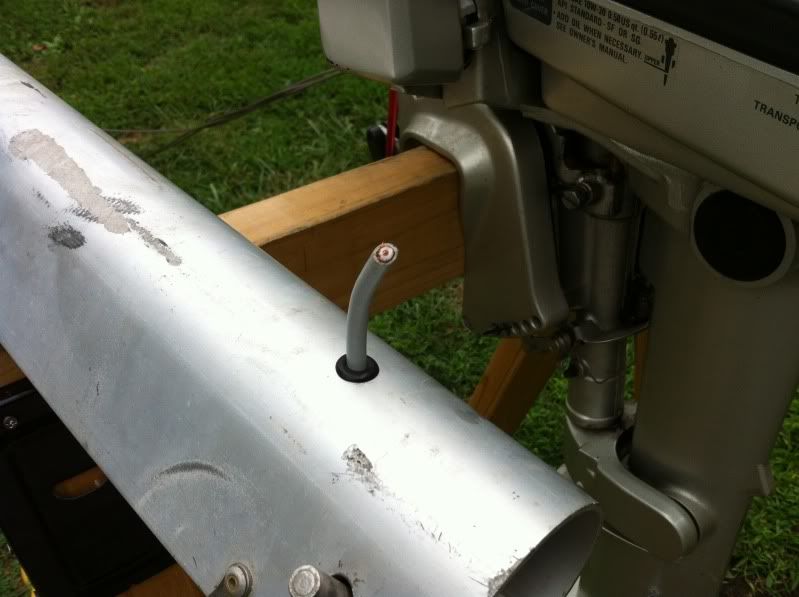
I drilled out a hole and put a grommet where the wire was to exit for the combo light.
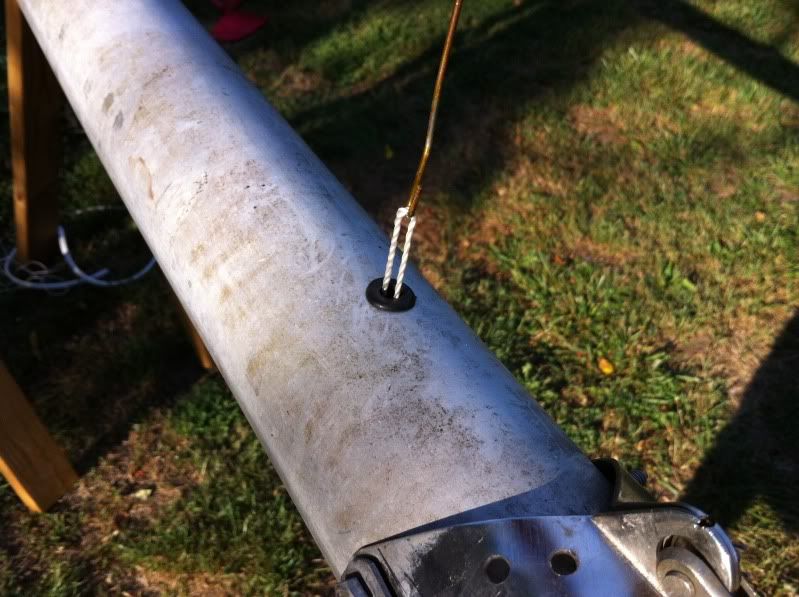
I then stripped back about 6 inches of the outer insulation from the 16/3 and with lots of electrical tape secured it to the string at the top of the mast. When I ran the string I forgot to mention that the bitter end was at the base of the mast and the remaining spool of string was at the top.
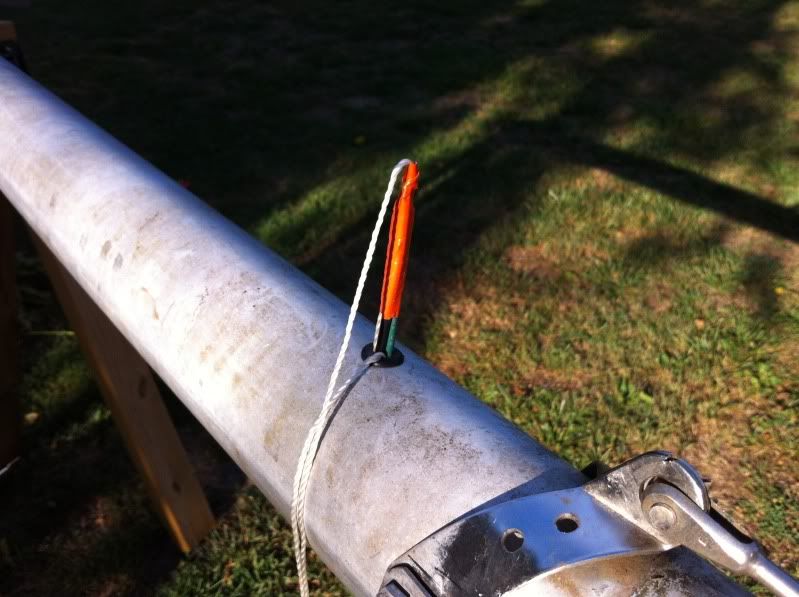
I then took a little piece of coat hanger and made a little hook at the end with a pair of needle nose pliers. I put a little tension on the string so it would be easy to grab and I pulled a loop of it out through the grommeted hole part way down the mast.
I then pulled on the string until I could pull the 16/3 from the top of the mast to the hole for the combo light.
I then secured it really well to the mast so I wouldn't accidently get pulled back through. The string was untaped and the loop pulled back through the grommet to the inside of the mast.
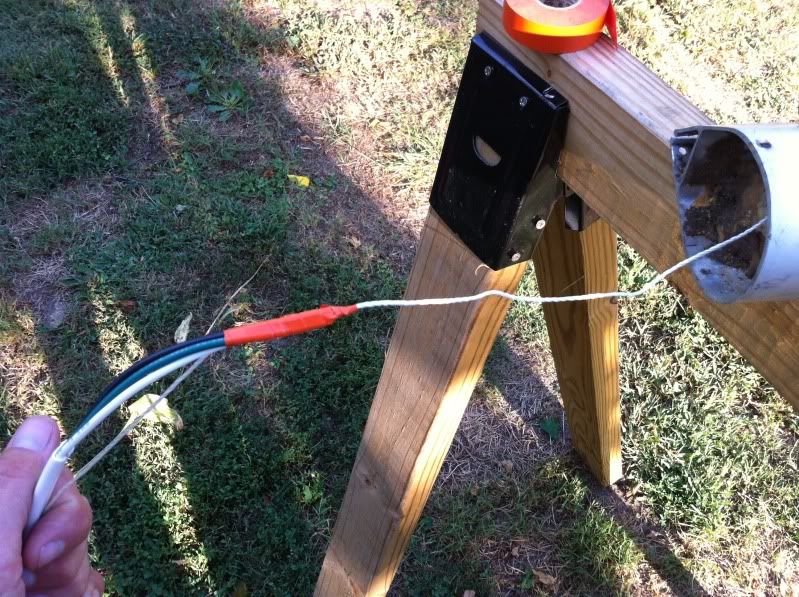
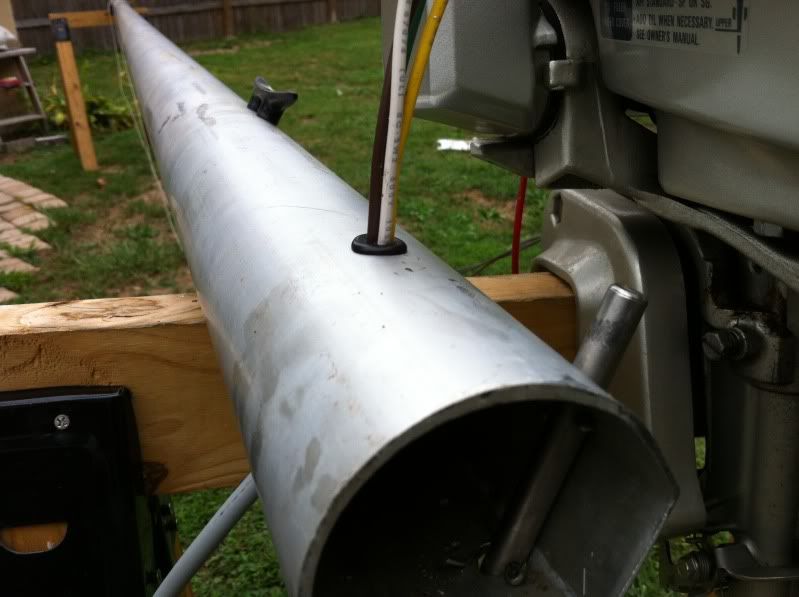
Next was to get the 16/4 and RG8X (for the marine antenna) from the bottom to the top of the mast. Taking the bitter end of the sting and lots of tape so the string didn't slip out I secured it all together. Didn't get a picture of that, but here is a photo of the 16/3 taped to the string at the top of the mast.
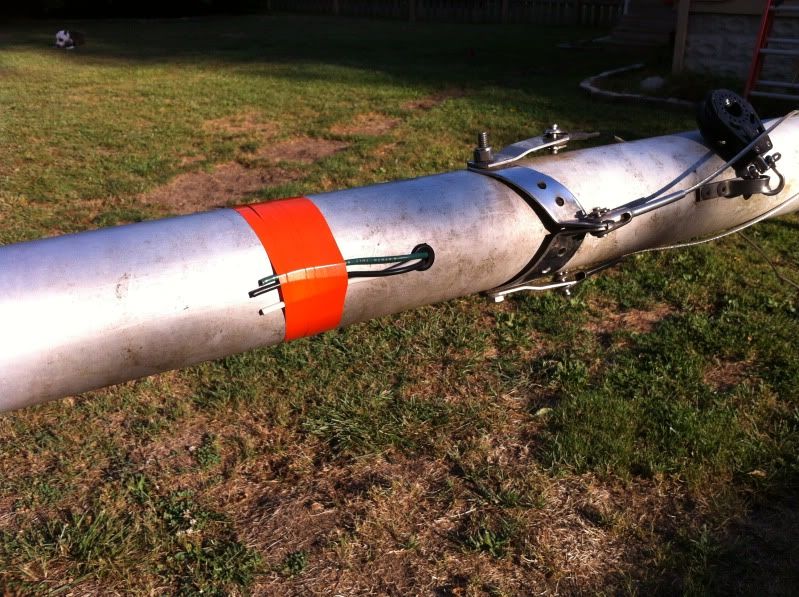
Slowly pulling the wire through the mast with the string, I stopped every foot to do this:
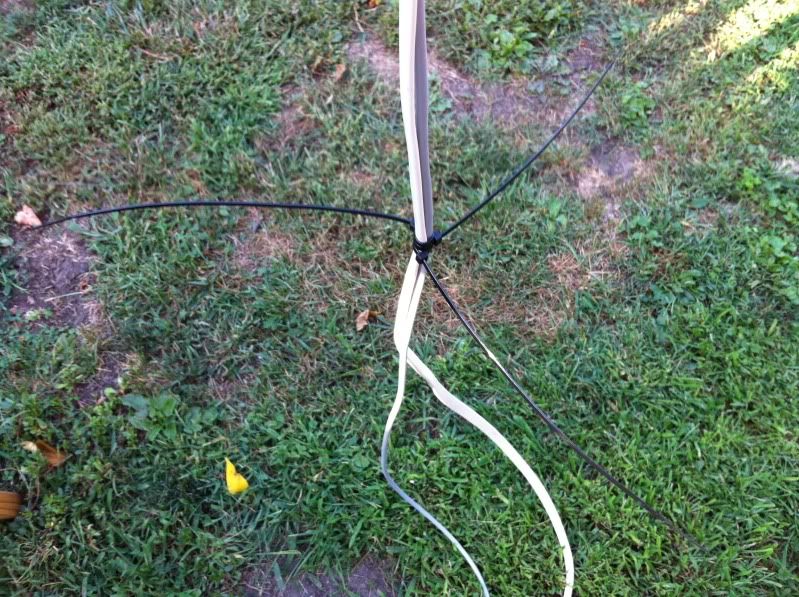
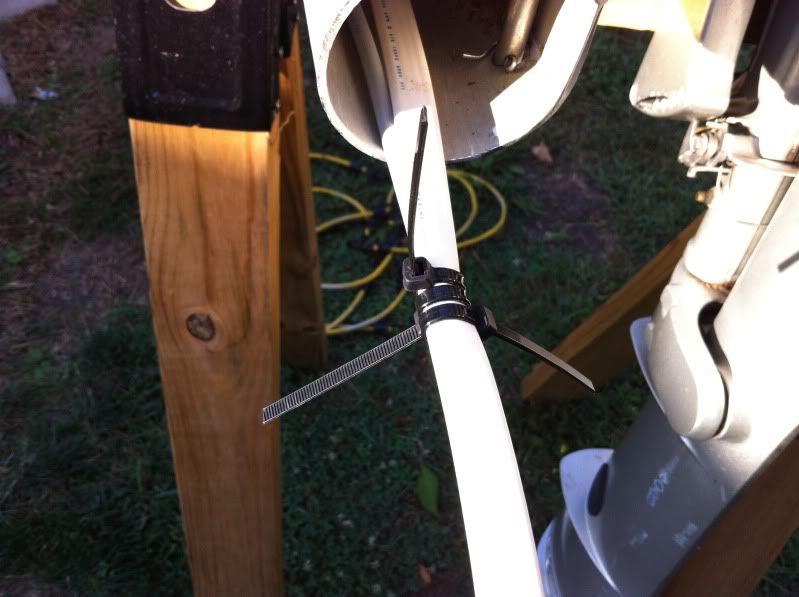
It's suppose to keep the wires from slapping around and I thought it would also help support the weight of the wire.
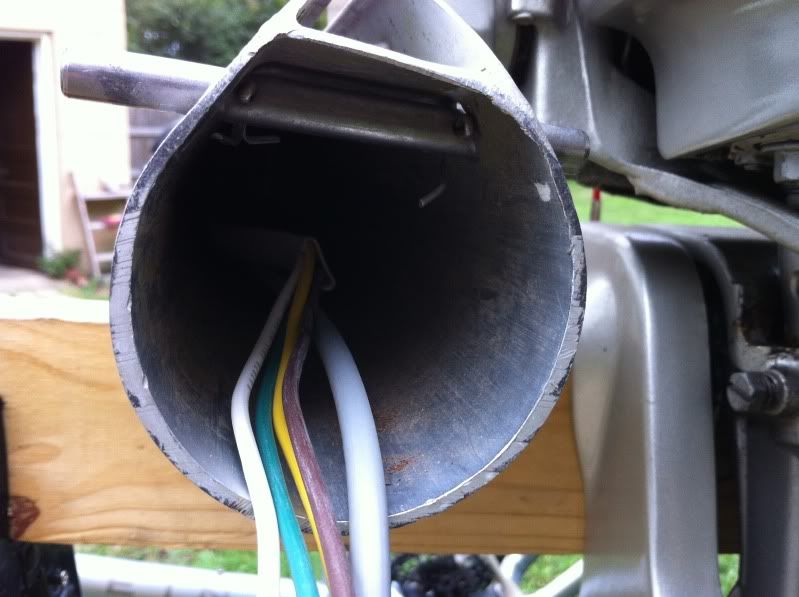
The base now looks like this:
And the top looks like this:
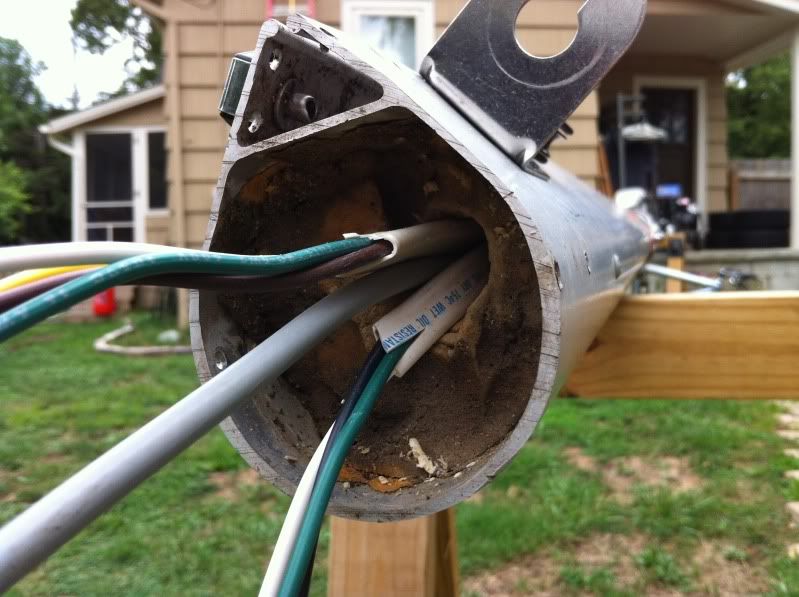
Now it's time for solder and shrink tubing. Two of the wires from the 16/4 get connected to two of the wires from the 16/4. These are the two pos leads going to your steaming light and your deck light. Leave the 3rd wire from the 16/4 long as the pos lead to the anchor light. The 4th wire from the 16/4 and the 3rd wire from the 16/3 as well as another piece of matching 16g wire all get soldered together as your ground.
In the picture below you can see the green from the 16/4 and the green from the 16/3 soldered together. The third goes out past the top of the picture. The third wire is the ground for the anchor light. The white from the 16/4 and the white from the 16/3 are connected together and because the 16/3 just didn't come with the right colors the brown from the 16/4 and the black from the 16/3 are connected together.
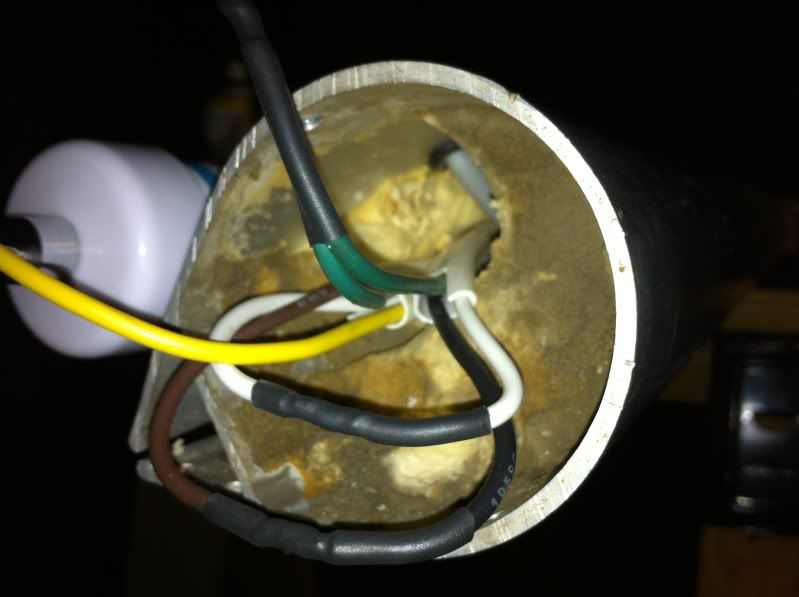
I then stuffed the connections down in the foam a little.
The anchor light was mounted to the cap on the mast like this:
I know that wont work on the Chrysler with the sheaves up there, but though I would just show what I could here and others can change things as needed for the Chrysler.
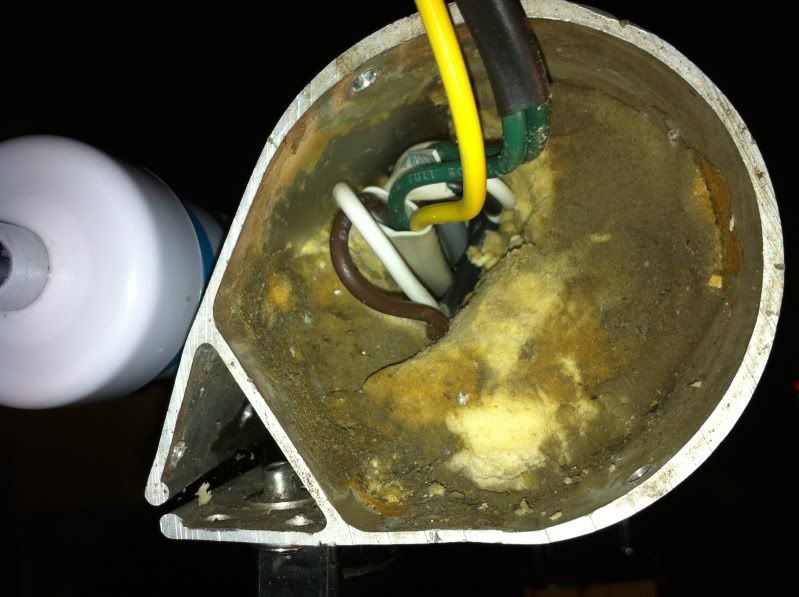
Here are a few pics completing the anchor light wiring..
I put a hole in the side of the mast near the top for the antenna wire. I made a point to put it higher than the connection to create a drip loop so excess water would not be guided right down the inside of the mast. While all my connections are pretty weather proof there is not point in allowing more water down the inside of the mast than needed.
Two more opposing holes at the base of the mast for the 16/4 and the RG8X to exit.
I didn't get it finished before trading the boat but the plan was to pop rivet the combo light to the face of the mast covering the wiring hole and wire it all in.
To reduce the load on everything I went to Lowes and bought a 12v LED replacement to the 12v halogen in the deck light portion of the combo light. It fit perfectly and after testing at night it was plenty bring with only a fraction of the current draw on the electrical system. The replacement bulb was about $20 but now shown in this picture.
Well since I'm new to this forum let me apologize for this super long post. I have been on many car forums in the past and this type of DIY post was usually accepted with open arms. I enjoy doing this for the online communities I'm involved in so hopefully you guys find it helpful.
Also while this isn't on my Chrysler, I do plan to make the same addition to my newly acquired C-22. Obviously I'll need to come up with another solution for the anchor light but I'm sure one is out there. I also plan to change the anchor and steaming bulbs to LED's.
Cheers,
Chris
I used this:
http://www.jamestowndistributors.com/us ... Round+Lamp
and this:
http://www.jamestowndistributors.com/us ... Combo+Lamp
I started about by getting some 16/4 in the length of the mast plus a few feet extra at each end. Then I got some 16/3 in in the lenght from the top of the mast to the point where I wanted to mount the combo light.
I put the mast on a couple of saw horses and used an old stay from a Catalina 25 to snake a string through the mast. I did have to dig out a little bit of the foam that was in the top of the mast.
I drilled out a hole and put a grommet where the wire was to exit for the combo light.
I then stripped back about 6 inches of the outer insulation from the 16/3 and with lots of electrical tape secured it to the string at the top of the mast. When I ran the string I forgot to mention that the bitter end was at the base of the mast and the remaining spool of string was at the top.
I then took a little piece of coat hanger and made a little hook at the end with a pair of needle nose pliers. I put a little tension on the string so it would be easy to grab and I pulled a loop of it out through the grommeted hole part way down the mast.
I then pulled on the string until I could pull the 16/3 from the top of the mast to the hole for the combo light.
I then secured it really well to the mast so I wouldn't accidently get pulled back through. The string was untaped and the loop pulled back through the grommet to the inside of the mast.
Next was to get the 16/4 and RG8X (for the marine antenna) from the bottom to the top of the mast. Taking the bitter end of the sting and lots of tape so the string didn't slip out I secured it all together. Didn't get a picture of that, but here is a photo of the 16/3 taped to the string at the top of the mast.
Slowly pulling the wire through the mast with the string, I stopped every foot to do this:
It's suppose to keep the wires from slapping around and I thought it would also help support the weight of the wire.
The base now looks like this:
And the top looks like this:
Now it's time for solder and shrink tubing. Two of the wires from the 16/4 get connected to two of the wires from the 16/4. These are the two pos leads going to your steaming light and your deck light. Leave the 3rd wire from the 16/4 long as the pos lead to the anchor light. The 4th wire from the 16/4 and the 3rd wire from the 16/3 as well as another piece of matching 16g wire all get soldered together as your ground.
In the picture below you can see the green from the 16/4 and the green from the 16/3 soldered together. The third goes out past the top of the picture. The third wire is the ground for the anchor light. The white from the 16/4 and the white from the 16/3 are connected together and because the 16/3 just didn't come with the right colors the brown from the 16/4 and the black from the 16/3 are connected together.
I then stuffed the connections down in the foam a little.
The anchor light was mounted to the cap on the mast like this:
I know that wont work on the Chrysler with the sheaves up there, but though I would just show what I could here and others can change things as needed for the Chrysler.
Here are a few pics completing the anchor light wiring..
I put a hole in the side of the mast near the top for the antenna wire. I made a point to put it higher than the connection to create a drip loop so excess water would not be guided right down the inside of the mast. While all my connections are pretty weather proof there is not point in allowing more water down the inside of the mast than needed.
Two more opposing holes at the base of the mast for the 16/4 and the RG8X to exit.
I didn't get it finished before trading the boat but the plan was to pop rivet the combo light to the face of the mast covering the wiring hole and wire it all in.
To reduce the load on everything I went to Lowes and bought a 12v LED replacement to the 12v halogen in the deck light portion of the combo light. It fit perfectly and after testing at night it was plenty bring with only a fraction of the current draw on the electrical system. The replacement bulb was about $20 but now shown in this picture.
Well since I'm new to this forum let me apologize for this super long post. I have been on many car forums in the past and this type of DIY post was usually accepted with open arms. I enjoy doing this for the online communities I'm involved in so hopefully you guys find it helpful.
Also while this isn't on my Chrysler, I do plan to make the same addition to my newly acquired C-22. Obviously I'll need to come up with another solution for the anchor light but I'm sure one is out there. I also plan to change the anchor and steaming bulbs to LED's.
Cheers,
Chris
Last edited by dubbinchris on Thu Nov 08, 2012 6:55 pm, edited 1 time in total.