Being new to sailing and boats in general I need some info on how to clean and prepare the bottom for the upcoming season. Any help will be greatly appreciated.
Thanks,
Larry
Bottom paint
and for the next question in line....
"No single bottom paint is the best choice for everyone. The type of bottom paint you need depends on how fast your boat moves through the water, how smooth you want the bottom, how long the paint needs to last-year round or just through the summer-and perhaps the type of paint already on the bottom. Also, paint formulations that are a good match for the fouling conditions in one body of water sometimes give disappointing results in another. The best way to pick a new bottom paint is to find other boaters in your area who use their boats similar to the way you use yours and ask what paint they like. If it works for them, it will work for you. Buy the paint you hear praised most often." - Don Casey
"No single bottom paint is the best choice for everyone. The type of bottom paint you need depends on how fast your boat moves through the water, how smooth you want the bottom, how long the paint needs to last-year round or just through the summer-and perhaps the type of paint already on the bottom. Also, paint formulations that are a good match for the fouling conditions in one body of water sometimes give disappointing results in another. The best way to pick a new bottom paint is to find other boaters in your area who use their boats similar to the way you use yours and ask what paint they like. If it works for them, it will work for you. Buy the paint you hear praised most often." - Don Casey
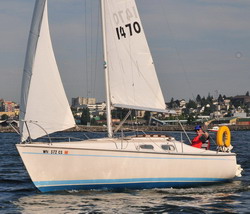
1976 - C22
"AnneMarie"
"AnneMarie"
I was taught this by Captain Scott (69Shark). When I did it I was absolutely shocked at how good it looked and how easy it was to do.
Note: Like Mariner said, I will not recommended a bottom paint. I've done this job once and I just bought the first bottom paint I found. Rust-Olium Marine Bottom Paint at $32/quart from Lowe's Home Improvement. I worked there at the time and got a 10% discount. 1 Quart did the whole thing in one coat. I bought a second quart for touch-up later in the year after a rough handling by the launch crew at my marina one time.
Steps I used:
1. Pressure wash the whole boat top to bottom. Even the parts your not painting. (Because you don't want some dirt dropping down from the upper part of your boat into you new paint.)
2. Do not paint on a windy day. Stuff once again will get blown into your new paint job.
3. Get an Osculating sander. Again I got a close out one at Lowe's for $8.00. Sand the area below the water line with 100 grit sand paper. It took maybe one 8 1/2" x 11" sheet of sand paper to do the whole bottom.
4. Pressure wash the bottom of the boat again to get off all the little bits left behind by the sanding.
5. Mask off from the water line down with blue 2" wide painters masking tape.
6. Fix any scratches or defects in the fiberglass hull. (I did not have to do this as the hull was not banged up at all. Which is good because I don't know how to do the fiberglass part yet.)
7. Get a Small paint roller like you would use on a bedroom in your house. (The one I used was about 7" across.)
8. Paint the bottom of your boat with the roller.
9. Wait 1 hour and peal off the blue painters tape you masked everything with.
10. Take a photo of your work because it will look fantastic beyond you wildest hope. (Well it looked that good to me anyway.)
Oh yea one side note I did not do but wish I had done on my keel:
1. Wire brush the Keel, then Sand the Keel before painting. (I did this part.)
2. Same as above wash off the dusty bits off and let dry.
3. This I did not do and wish I had. Paint the keel in an latex outdoor type paint for the first coat. Not a bottom paint. (My bottom paint reacted with my steel keel and it rusted and started flaking bottom paint just about 6 months after I painted it.)
4. Paint over the keels first coat of none bottom paint with the same bottom paint you use on the rest of the boat.
This puts a layer of latex paint between your keel and your bottom paint so the bottom paint wont react.
Seriously the paint roller does an amazing job on the hull and its fast.
I did the whole job on my boat in maybe 6 to 8 hours. I only power washed once after sanding the bottom now that I think of it. And yes I washed it from top to bottom.
It was probably just my imagination but my boats sailed smoother and faster after I painted the bottom.
Thanks
Alan
It's a good life on the
Honu, 1976 C-22
My Chrysler Sailing Photos: http://s1297.beta.photobucket.com/user/ ... ry/Sailing
Honu, 1976 C-22
My Chrysler Sailing Photos: http://s1297.beta.photobucket.com/user/ ... ry/Sailing
-
excavman
-
excavman
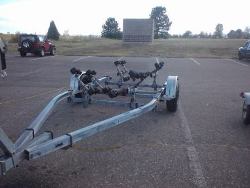
I finally finished the sanding today, what a job. Dirty, nasty, the sanding dust was terrible even with a face mask on. I have a roller trailer so I did all I could get to then used a come-along to winch her back about a foot so that I could do the rest. I'll paint what I can tomorrow and when the paint dries I'll roll her back forward and do the bare spots.
I motored the land yacht down here to Port O'Connor a week ago Monday and have been polishing, waxing and sanding ever since. The weather has been great for working outside. The ICW is about a half mile from this RV park and I can hear the commercial boats going out early in the morning.
I sure hope I can get her in the water in another week or two. The winds have been good for a short trip down the ditch to the Corpus Christi area. That would be a nice 'maiden voyage'.
Larry
Sounding good excavman,
Yea the sander I got on close out had it's own vacuum filter type thing built right into it so that kept the dust down for me. I'd work for about 30 minutes and dump out the vacuum catch container, and start sanding again. I was still wearing a dust mask and I had somewhat of a blue face and hair when I was done. It did not come out on my first washing as I recall. Well I guess that's why I have not had any barnacles on me personally since.
Thanks for the update, I was wondering how it was coming along. Don't forget to take photos as you go. I never did take a finished photo when I was done. I expected it to be that pretty for years to come. This finish is still good, the color has faded at slightly different rates so the coloring looks kind of bad but again the finish is still going strong just not so much for the pigment. I have to redo the keel due to my not sealing it first. It's all flaky and crusty with rust again with large areas of paint that have come off.
Serves me right, the bottom paint reacted with the keel and rusted toot sweet. It's obvious to me now. Another nube mistake I made and I hope other will profit from it.
Thanks
Alan
It's a good life on the
Honu, 1976 C-22
My Chrysler Sailing Photos: http://s1297.beta.photobucket.com/user/ ... ry/Sailing
Honu, 1976 C-22
My Chrysler Sailing Photos: http://s1297.beta.photobucket.com/user/ ... ry/Sailing

Alan et al-
I was planning on sealing my keel after sandblasting with the same rust killing sealer I used on my trailer (Zero Rust). Then probably overcoating with the two-part I'll use to undercoat the hull.
Any suggestions?
Thanks!
I was planning on sealing my keel after sandblasting with the same rust killing sealer I used on my trailer (Zero Rust). Then probably overcoating with the two-part I'll use to undercoat the hull.
Any suggestions?
Thanks!
Mark
http://s1213.photobucket.com/albums/cc4 ... ew%20C-22/
1975 C-22 currently named Stardust (soon to be "Angela Marie")
http://s1213.photobucket.com/albums/cc4 ... ew%20C-22/
1975 C-22 currently named Stardust (soon to be "Angela Marie")
Larry that sounds good to me. I may have to try that myself. I'll be sanding though, no access to a sand blaster. And I'm too chicken to sandblast with the keel still in the hull. What I did to a car body with a sand blaster when I was 17 years old was not pretty. I put a hole right through the body. 
Imagine what damage I could do with a sandblaster on a fiberglass hull with just a little over spray. I would go from a 22 foot sailboat to a 22 foot colander real fast.
Thanks
Alan
Imagine what damage I could do with a sandblaster on a fiberglass hull with just a little over spray. I would go from a 22 foot sailboat to a 22 foot colander real fast.
Thanks
Alan
It's a good life on the
Honu, 1976 C-22
My Chrysler Sailing Photos: http://s1297.beta.photobucket.com/user/ ... ry/Sailing
Honu, 1976 C-22
My Chrysler Sailing Photos: http://s1297.beta.photobucket.com/user/ ... ry/Sailing
Thanks Fred! 
My keel will be a long ways away from the hull when this all happens!
Cheers!
My keel will be a long ways away from the hull when this all happens!
Cheers!
Mark
http://s1213.photobucket.com/albums/cc4 ... ew%20C-22/
1975 C-22 currently named Stardust (soon to be "Angela Marie")
http://s1213.photobucket.com/albums/cc4 ... ew%20C-22/
1975 C-22 currently named Stardust (soon to be "Angela Marie")
-
Capt. Bondo

- Posts: 713
- Joined: Thu Aug 20, 2009 8:08 am
- Location: Hudson, WI
Since Happy Place has never had her bottom painted, and that's OK by me.
She spends 4-5 months in a snow bank.
A good wax job at the beginning if the season, has worked out OK. Another wax job mid season would be good, but by mid summer I rather be sailing
Her bottom does not get much abuse being a dry docked boat used in fresh water...that's OK by me!
She spends 4-5 months in a snow bank.
A good wax job at the beginning if the season, has worked out OK. Another wax job mid season would be good, but by mid summer I rather be sailing
Her bottom does not get much abuse being a dry docked boat used in fresh water...that's OK by me!
H:)ppy Place
78 Chrysler 22
You can go to a Zen Master or you can go Sailing, either way you end up in about the same place..... a Happy Place
78 Chrysler 22
You can go to a Zen Master or you can go Sailing, either way you end up in about the same place..... a Happy Place
-
excavman
Alan,
Almost done, all I have to do is roll her forward and paint 16 little bare spots and touch up around the keel.
I had to do a patch job on the rudder, the PO said he motored into a shallow spot and the rudder kicked up into the prop and the prop was hungry. I mixed up some fiberglass jellied resin stuff from Wal-Mart and layed it out on wax paper, added some fiberglass cloth for strength and slapped it in place using the wax paper to shape it the way I wanted it. When it is almost set take the paper off.
I sanded all the old hull patches, thought about redoing them and decided not to, they held up this long, don't fix it if it ain't broke. Whoever did the old patches didn't sand them very good and didn't prime them either. I am firm believer in using primer. I did have reservations about using primer under the bottom paint so I did the rudder first and painted it. After drying overnight the paint was still looking good so I primed the rest of the patches. When in doubt do a small spot first so you don't have to redo the whole thing if it doesn't work.
I think it came out really nice, Sally Ann will be the prettiest girl at the ball --- or the ICW.
Larry
PS --- Here's the link to the pictures, Thanks for your help. lps
http://s1121.photobucket.com/albums/l50 ... m%20Paint/
Nice job, Larry! Looking real good! Like how the rudder repair turned out.
Good Lord, I can't wait to get started on mine! Only a couple days til spring folks!
Good Lord, I can't wait to get started on mine! Only a couple days til spring folks!
Mark
http://s1213.photobucket.com/albums/cc4 ... ew%20C-22/
1975 C-22 currently named Stardust (soon to be "Angela Marie")
http://s1213.photobucket.com/albums/cc4 ... ew%20C-22/
1975 C-22 currently named Stardust (soon to be "Angela Marie")
-
CaptainScott
- Site Admin

- Posts: 3112
- Joined: Wed Sep 24, 2008 10:46 am
- Location: Washington State
- Contact:
Bravo, and a hip-hip hooray times 3 Larry!
Well I will call that bottom painting and rudder restore an unqualified success. Thank you for the pictures and the step by step on the rudder glassing. I have seen glassing done but never attempted it myself. I will do my first glassing this Spring, and I will employee your methods with the wax paper. The fiberglass around my stern light is in need of some very minor repair do to the stern light screws stripping out and taking a little of the glass with them. I lily could fix it with epoxy but I was told long ago by a old salt at fiber glassing not to do that, always use fiber glass.
Thanks
Alan
It's a good life on the
Honu, 1976 C-22
My Chrysler Sailing Photos: http://s1297.beta.photobucket.com/user/ ... ry/Sailing
Honu, 1976 C-22
My Chrysler Sailing Photos: http://s1297.beta.photobucket.com/user/ ... ry/Sailing
-
excavman
Congrats on getting her in and using her!
Jeff
s/v Windward
1978 C-26 #481
http://www.lizards.net
http://www.sv-windward.com
http://www.chryslersailing.com
s/v Windward
1978 C-26 #481
http://www.lizards.net
http://www.sv-windward.com
http://www.chryslersailing.com
-
EmergencyExit
- Site Admin
- Posts: 2954
- Joined: Wed Dec 10, 2003 5:02 pm
- Location: Mississippi Gulf Coast
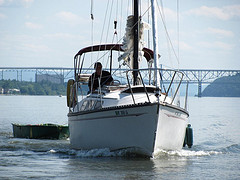
Glad to hear you got her in and got some dacron in the air the first time I had My Getaway out the replica of Henry Hudson's Half Moon was leaving Catskill and sailing south so I went the first 10 miles with them and I was going much faster than the square rigged boat that I had to come about and a starboard tack a short time then a port tack. needless to say I was sailing around them then when I got to where shallow water would affect safety for me or them I turned back and tacked home.
Catch the wind and ride the wave, Have fun
Lyle
1980 C-26 #1100
S/V My Getaway
http://www.flickr.com/photos/34432376@N06/
Lyle
1980 C-26 #1100
S/V My Getaway
http://www.flickr.com/photos/34432376@N06/
Sweet, thanks for the photo's.
Thanks
Alan
Thanks
Alan
It's a good life on the
Honu, 1976 C-22
My Chrysler Sailing Photos: http://s1297.beta.photobucket.com/user/ ... ry/Sailing
Honu, 1976 C-22
My Chrysler Sailing Photos: http://s1297.beta.photobucket.com/user/ ... ry/Sailing
-
clair hofmann
- Posts: 221
- Joined: Sun Apr 10, 2005 6:20 pm
- Location: S.E.Pa / Inner banks NC
Cdmcdan what I do is paint what is not covered by bunks and I used a floor jack with wood to protect boat keel and raised in stern enough to get there and then to bow for the rest.
Catch the wind and ride the wave, Have fun
Lyle
1980 C-26 #1100
S/V My Getaway
http://www.flickr.com/photos/34432376@N06/
Lyle
1980 C-26 #1100
S/V My Getaway
http://www.flickr.com/photos/34432376@N06/
-
excavman