Page 1 of 1
Sliding Track for the Hatch
Posted: Tue Aug 09, 2011 9:27 am
by al the pal
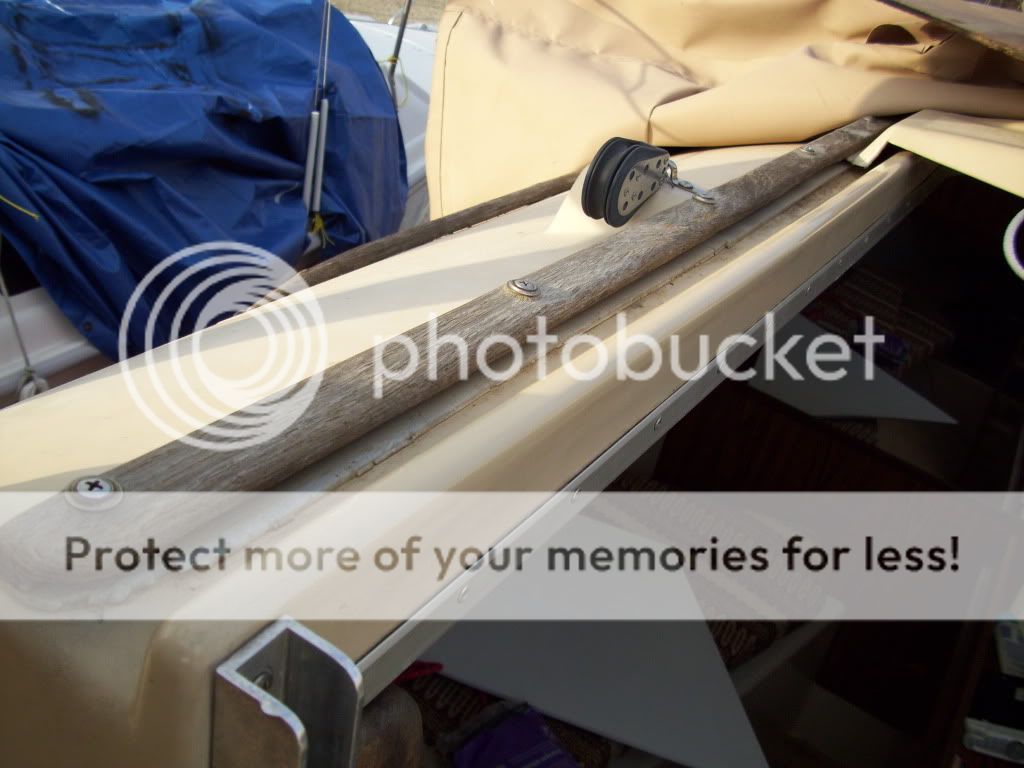
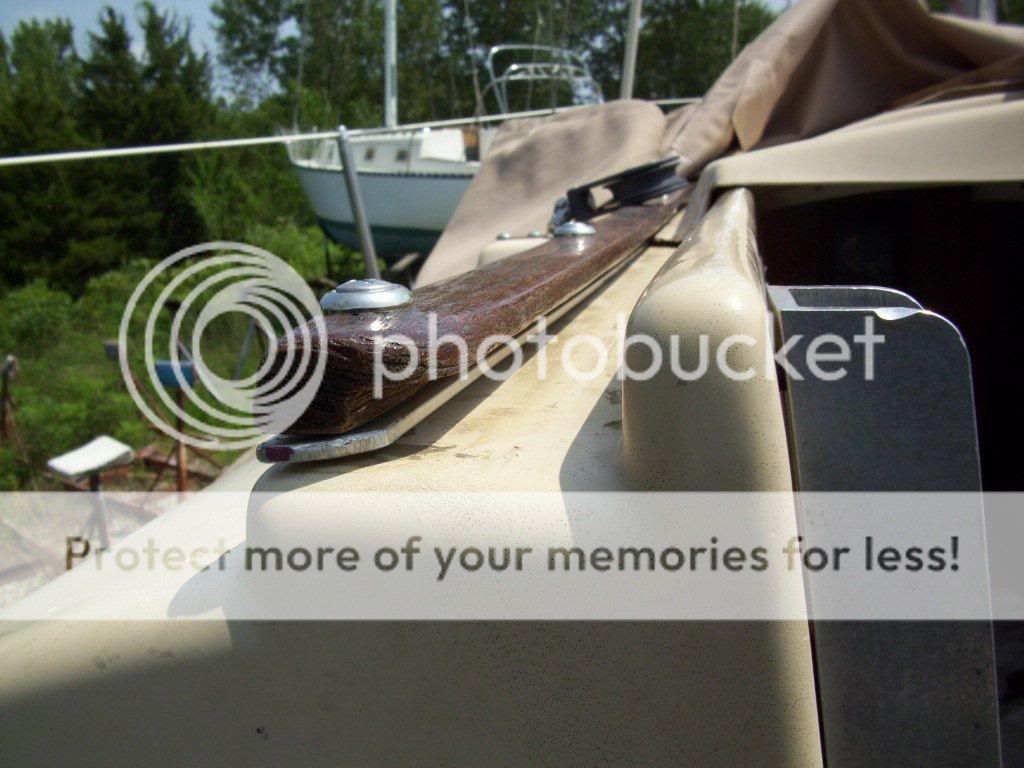
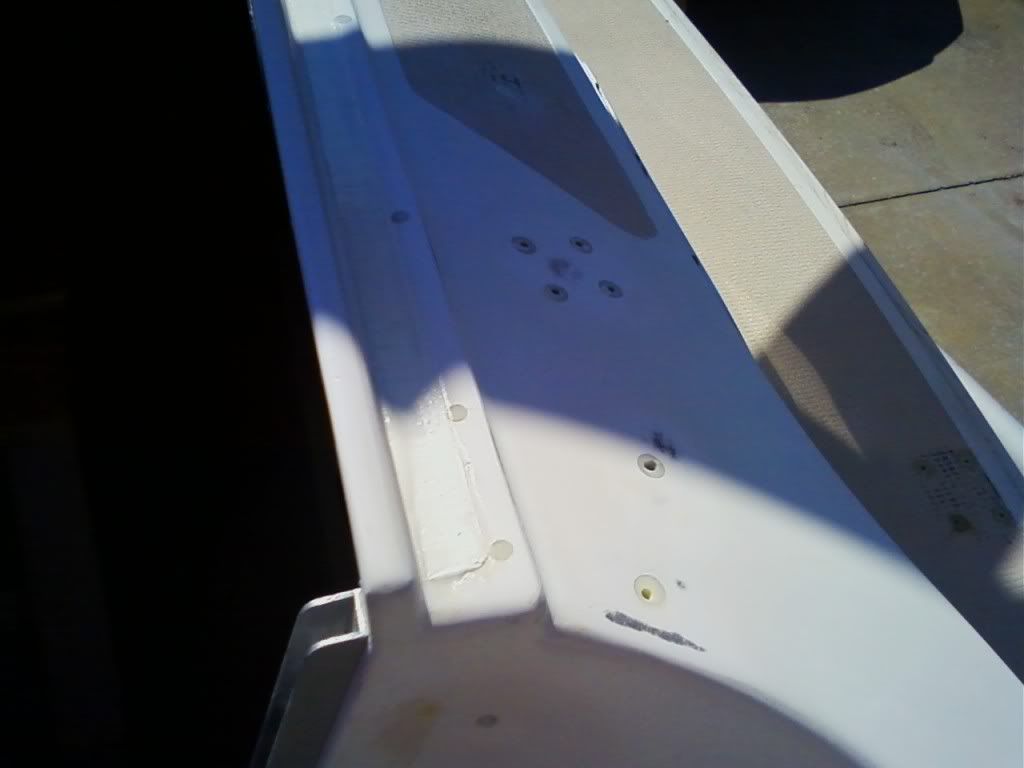
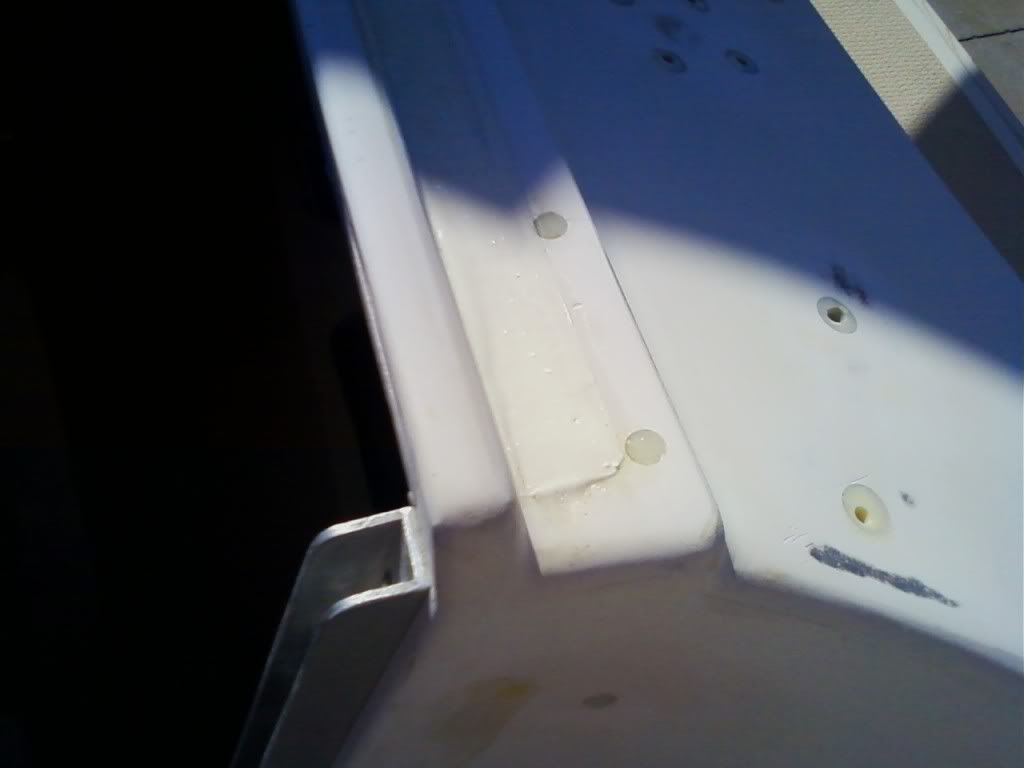
When I removed the teak rails for the hatch so that I could refinish them, the plastic layer beneath the rail disintegrated. The material seems to be some type of nylon or similar plastic that I could not find an equivalent to while re-finishing the teak. See an image of the rail before I removed it, and an example of the plastic material.

I did find some aluminum that was almost perfect in thickness and length for a temporatry substitute; however, the width is unsatisfactory. The most siginificant issue is that the resistance between the fiberglass hatch and the aluminum is too great, and ultimately this will not do as a replacement material. Has anyone else replaced this plastic/nylon material? Does anyone know what it was? I assume the internet would provide access to purchase the material, but I do not know where to go or what to ask for. Sorry for all the questions today!
Posted: Tue Aug 09, 2011 10:38 am
by hp18carr
Check out McMaster-Carr you may find something suitable there,
http://www.mcmaster.com/# I'm trying something a bit different but it's to early to tell just yet if it will work will need to do a bit of triming.
Terrence
Wilmington N.C.
Chrysler 26' 1980
Pandora (for now)
Posted: Tue Aug 09, 2011 11:17 am
by Windwalker
I didn't bother to replace the plastic. Sand and wax the deck and then refinished the hatch lip with polyester resin where it slides on the deck. This worked better then the plastic did, of course it was broken and groved.
Posted: Tue Aug 09, 2011 11:34 am
by al the pal
Terrence... that hatch looks good! Nice work. What is material you have under the rails? It looks like rubber from here, but that can't be it.
Windwalker... does the hatch really move around on you with the extra head space? I thought about not replacing the plastic, but worried that the hatch coudl even flop out if it had too much vertical space... in some extreme

condition that I woudl likely not even be sailing in anyway.
Posted: Tue Aug 09, 2011 12:05 pm
by Windwalker
At least on my 78, the deck the hatch slides on is curved fore to aft. This keeps the hatch firm between the rails and the deck.
No issues at all with the hatch having too much room. It has been in some big blows under sail and in the slip.
Posted: Tue Aug 09, 2011 12:58 pm
by EmergencyExit
EE's plastic was replaced with a strip of flat PVC molding strip from Lowe's. McMaster-Carr will have a much more quality product, and that would be a better long term choice.
Posted: Tue Aug 09, 2011 1:06 pm
by mcrandall
Al-
I would guess it's an HDPE. You can get it from McMaster-Carr.
My C-22 doesn't have any under it, but it will when I'm done with it. My gelcoat is completely worn down where the hatch slides under the teak rails.
Posted: Tue Aug 09, 2011 1:17 pm
by hp18carr
Hay... cut me some slack here... I'm experimenting with Lowes's best $3.00 hard rubber baseboard molding here. If there is any great amount of resistance between surfaces i'll use some of the low resistance tape I used in the tracks for the hatch boards, worked fine. True it may all come to naught but its fun at times to working outside the box.
Terrence
Wilmington N.C.
Chrysler 26' 1980
Pandora (for now)
Posted: Tue Aug 09, 2011 1:37 pm
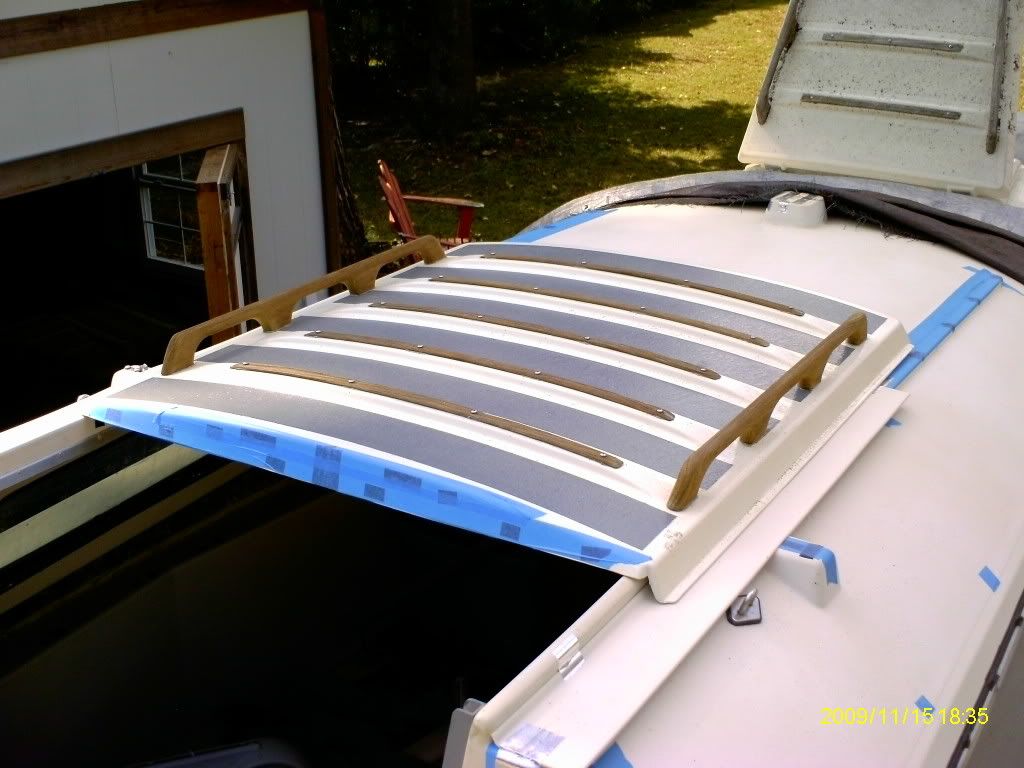
by Bhacurly
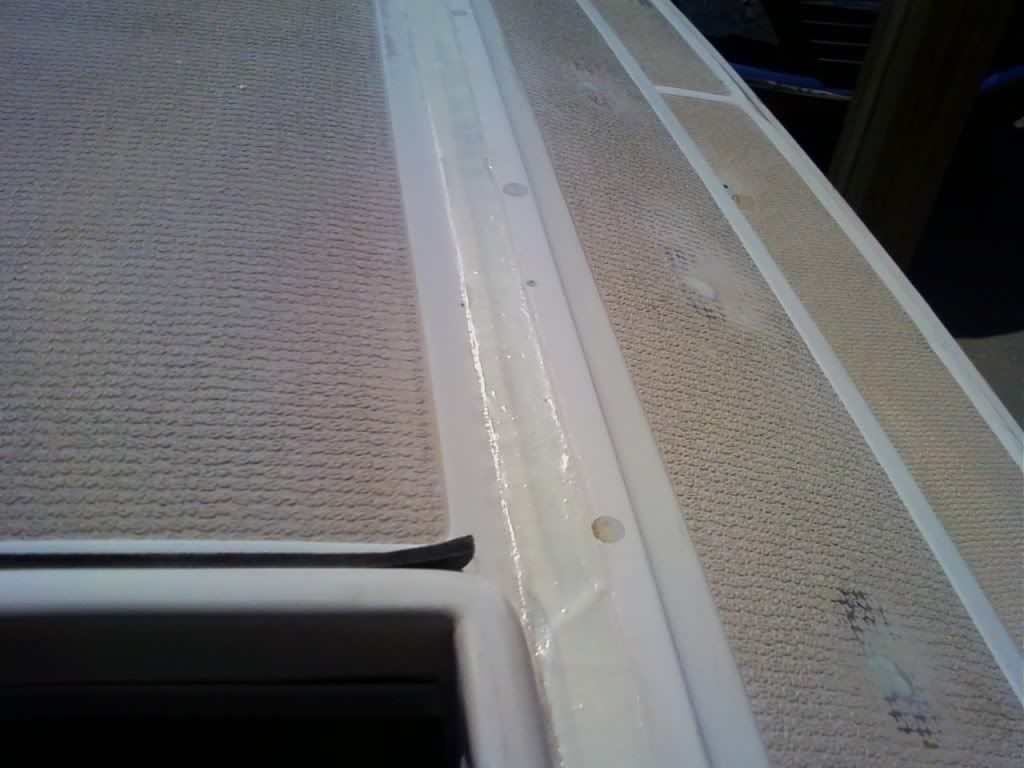
I replaced mine w/ UHMW in a strip...
Has worked well for me so far. You can just make it out in the pict:
 Untitled
 by
bhacurly, on Flickr
Posted: Tue Aug 09, 2011 4:02 pm
by bryan
Al, per others in this post, I replaced mine with UHMW from McMaster-Carr. It worked perfect. I bought a sheet of it at the right length and thickness, then cut it into two strips the same width as the originals. Apply a little sealer under the strips and screw holes for a nice snug hold.
Posted: Wed Aug 10, 2011 9:11 am
by Capt. Bondo
I'm not sure what the thickness is, but would some left over vinyl siding or soffit work?

Sorry, it's just the dumpster diver in me...But

Posted: Wed Aug 10, 2011 12:03 pm
by al the pal
Thanks for the help, everyone! Some engineers in my office have McMaster-Carr catalogs, so I should be able to find the material quickly. Hopefully I do not see anything else I just have to have during the looking... those catalogs are fraught with cool stuff!
Alternative
Posted: Wed Aug 10, 2011 2:48 pm
by Windwalker
I am currently reworking my brightwork and have the hatch off. I found a product that I am going to use on both the hatch and the deck where the hatch slides, teflon powder for use in resin! I will resin the hatch lip on both the top and bottom sides where it slides on the wood rail. I will also use surfboard resin with the UV additives already in.
This stuff is suppose to get slicker the more you use or sand it.
I will report on how easy it was to use and what the results are.
Posted: Thu Aug 11, 2011 12:31 am
by Alanhod
About 2 years ago, no maybe 3 years ago! Captain Scott (69shark) and I replaced those same slides on the C-22 he sold. We used some scrap Formica that I got for $5 at Lowes. We cut it in two strips to size and it worked great. It was a white surface and looked just like the OEM slide surface. Real smooth ride for the hatch when we were done.
That was the first time we did a project together and when we got done we looked at each other and said, "We should have taken step by step photos for the forum!" We have been careful ever since to document with photos just like above. Excellent coverage of this repair. Thank you!
Alan
Posted: Thu Aug 11, 2011 5:23 am
by mariner
I was looking at this also, the PO used a very thick piece of plastic here, although its in good condition it grows green stuff in between the layers. My plan is to replace this with LDPE Film Tape. I will stick one layer to the hatch itself and one layer to the boat...will post pics asap.
Posted: Thu Aug 11, 2011 3:08 pm
by Banshi
There was plastic there
......? Oh well, long gone on mine. A flat fiberglass batten might also work as a replacement.
MIND THE GAP!
Posted: Thu Sep 01, 2011 6:52 am
by NYCSAILOR
Look above at the great pic in Bhcurly's post... you will clearly see a big gap betweenthe top of teh hatchboards and the lip of the main sliding hatch...
now ... this is great for ventalation.. but lately.. I am getting a lot of water ingress from that gap... also bugs ( wasps!) come in.. now what is odd.. I never had a problem before.. but now I think wind id really blowing the rain in...
do you pull the hatch all the way aft and have a big gap.. or kinda slide it 'till it lines up with the top of teh hatch and have a small thin gap???
I get puddles of rain water on the starboard settee on the side of the ladder just below the hatch.. could this be from the BOTTOM of the hatch boards? does anyone use a gasket of some kind to seal either location ( top or bottom of hatch boards..
I also might need to rebed all the hatch board slider screws.. they might be leaking...
Posted: Thu Sep 01, 2011 7:20 am
by mariner
I used to get water in from the top but the biggest issue was dust and dirt, I cut a piece of pipe insulation, the kind with a slit in it for water pipes and just place it over the top of the top hatch board, works like a charm. You could also cut to length and shape a piece of roofing ridge ventilation stuff (the mesh stuff)
http://www.gaf.com/Roofing/Residential/ ... -Vent.aspx
and permanently afix it to the top hatch board, that would be flexible, allow for ventilation and keep most water out.
Posted: Thu Sep 01, 2011 4:28 pm
by Bhacurly
My wife made a sunbrella cover for the hatchboards. It is held by snaps over the aft end of the sliding hatch, a couple on each side of the opening, covers the board that reinforces the keel winch bolts, then has a rod to keep the bottom hanging into the cockpit.
This has kept all rain outta the cabin and protects the wood from the elements also. I dont have any picts of it now but will take some Labor day to show yall. When we sleep on the boat we put this in place w/o the boards to keep it warmer inside, and keep out most flying critters also.
Posted: Mon Sep 12, 2011 8:35 pm
by Bhacurly
Sorry it took a while, but here is our hatch cover Pam made, an yes she did the winch, tiller, grab rails, and mainsail covers also

 IMG_0203
 by
bhacurly, on Flickr
Billy
Posted: Tue Oct 04, 2011 5:53 pm
by mcrandall
I got some of the teflon powder Windwalker spoke of. Mixed in a batch of epoxy and coated the lip of the hatch and laid a strip on the deck.
The stuff is easy to work with, turns into the consistancy of Barbesol. Kicks a bit slower, allowing a little extra time to work. Really, it kicks to a very tacky sorta gooey consistency. Allowed me to mold it to the final shape I wanted with tape.
Nice and slick. I'll take some shots tomorrow. Anyone else with experience with this stuff?
Posted: Wed Oct 05, 2011 11:54 am
by Windwalker
Glad to know it worked. I got caught up with a lot of other projects on the boat and had not gotten to the teflon yet.
Posted: Wed Oct 05, 2011 3:49 pm
by mcrandall
Here are the promised pics:
This is the hatch cover with repair and coating of the teflon impregnated epoxy (West System Epoxy). Note I left some tape on their to show how I formed it in place after it "kicked" (sort of):
This was actually the last of two applications. Did this to fill the voids left from the first app.
Here's a couple of shots of the deck where the hatch slid on. I just taped off the area and applied the epoxy on the area with a putty knife. This coat here is quite thin, but with teflon on the hatch to match up to it, I don't think I'll see much wear and tear. But, as always, the proof is in the puddding:
You'll see what looks like a depression from where the hatch had worn a groove. Looks like the epoxy needs another coat to fill it in. Actually, the epoxy mixture is slightly translucent and shows off the depth of the fill here. It really is quite level. I put a few drops of acetone in the epoxy before spreading it on the deck. Wanted to make sure it flowed nicely in this very thin application.
The talk is that this stuff gets more slippery the more you use or sand it. Contrarily, I found that after sanding, it's somewhat more sticky. However, this might be that the teflon or epoxy has melted from the friction of sanding. When I checked it the next day, the epoxy was nice and hard and very slick. Moral of the story is, just don't expect instant results.
I had a broken corner on one of the flanges of my hatch (dropped it off the boat
). I rebuilt it using this epoxy, then sanded it down to the proper shape. I reefed on it a bit and found it to be quite strong. I think it will hold up nicely. Could have added some glass strips, but I think it will be fine.
My flanges are about twice the thickness of the originals. I have to replace the wood strips that cover the hatch flanges, so I will make allowances for them then.
Cheers!
Posted: Mon Oct 17, 2011 10:55 am
by Bhacurly
Oathay,
Where did you get the teflon powder? I can't find any in spokane.
Thanks
Posted: Mon Oct 17, 2011 7:09 pm
by mcrandall
Here you go, Billy:
http://www.epoxyproducts.com/2_fillers.html
The site is a pain, but you'll eventually find this page:
http://www.king-cart.com/cgi-bin/cart.c ... atch=exact
Pricy, but you don't need much. I see it used to "lube" pianos. Maybe you can find it in that community for cheaper. It's the consistancy of confectioneres sugar and miixes to a somewhat fluffy consistancy of shave cream.
Good luck!
Mark