Rivet Question
-
al the pal
- Posts: 82
- Joined: Mon Sep 28, 2009 9:59 am
- Location: Lake Perry, Kansas
Rivet Question
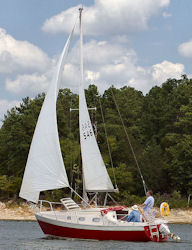
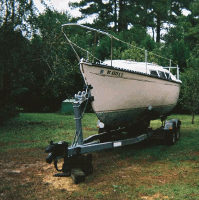
1979 C-26
My Boat Overhaul Blog: http://alexadrift.wordpress.com/
My Boat Overhaul Blog: http://alexadrift.wordpress.com/
-
Rivercruiser
- Site Admin

- Posts: 146
- Joined: Sat Oct 02, 2010 3:06 am
- Location: Norfolk
-
Windwalker
- Posts: 147
- Joined: Tue Mar 21, 2006 10:37 am
- Location: Spokane, WA
Rivets
These ARE stainless rivets! They are avalible BUT takes a stronger tool then your aluminum pop rivet gun. If you need to replace them then invest in the correct tool.
-
al the pal
- Posts: 82
- Joined: Mon Sep 28, 2009 9:59 am
- Location: Lake Perry, Kansas
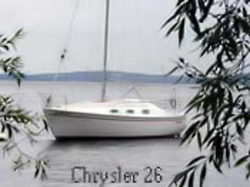
I was thinking about this project based on the results of another Chrysler 26 in the harbor (see the pictures of the other boat below). This mast and boom were painted over five years ago, and the boat has passed through the hands of four owners since being painted. I need to do more research into this as I already have a full winter of work ahead of me. I can't add too much more work to an already full list. As to what paint to use, I am not sure yet. Interlux had some products, but the prep work sounds like it might be very intense!


1979 C-26
My Boat Overhaul Blog: http://alexadrift.wordpress.com/
My Boat Overhaul Blog: http://alexadrift.wordpress.com/
Al the pal
As with about everything else painting my mast and boom is also on my list of things to do, and the rivets on the upper shrouds have caught my attention. To each their own, but if the effect on the overall paint job would be minute... unless the hardware is easy to remove or needed to be replaced I would just make due and paint around it. It may save you a bit of a headache and a few extra dollars, but thats just me.
Terrence
Wilmington N.C.
Chrysler 26' 1980
Pandora (for now)
-
al the pal
- Posts: 82
- Joined: Mon Sep 28, 2009 9:59 am
- Location: Lake Perry, Kansas
Terrence... I have never approached this boat project to achieve perfection, that is to be flawless from any perspective. I am intending to live by that 10 foot rule that everyone speaks of for viewing a paint job. If I were to paint around the upper shroud connections, who would notice or care. And when the mast is up, no one will ever see it. The rivets appear to be in good shape so I will likely just let them be... and move on to the rest of the list!
1979 C-26
My Boat Overhaul Blog: http://alexadrift.wordpress.com/
My Boat Overhaul Blog: http://alexadrift.wordpress.com/
Al...I was told that aluminum requires special primer to effect good adhesion...do some research before painting...and I subscribe to Wabi-sabi philosophy...that is, there is beauty to be found and appreciated in some imperfection...enjoy what you have and use it...some struggle makes the journey more memorable.
Bill
Drill the heads off with a large drill biit. I like 3/8 to 1/2 inch bits for almost everything. Larger bits will take the head off and leave the hole untouched, push the headless body through the hole to remove. Rivits like a good fit, don't bugger up the original hole and bob's your uncle. Rivits are stainless, my regular pop gun will set them. If you're concerned try your regular gun and SS your size rivit on scrap before you drill anything. A new pop rivit gun will get a better bite on the rivit shank.
For the paint it's true, you will need to lay down a coat of Alodine Conversion coating on the mast before your primer and topcoat. Awlgrip is what I used. You should only need a quart, it's consistancy is like thinner. The Interlux 2 part paints are glossy and tough. Do resist the temptation to keep it thick when you mix the hardener. For a home job it's roll and tip only as the overspray can make you really sick. If you have a pressurized mask go to town! One last thing, this stuff really stinks. I did the mast on my O'Day 22 some years ago and you could smell it 100 feet away while it was curing!
Luck!
Jim on Anhinga

I gotta know, why all the interest in painting? Masts at supposed to be aluminum. Is it just for the look? I've been told that you have a much better chance for electrolysis. Most black masts that came with boats with black toe rail were anodized I believe. As what stated, you need a very good etching primer. All in all, with special hardware and very expensive paints and not including labor, that's got to be a very expensive project.
I wonder if one can't just sand the existing spar and iridite or some other surface condition instead.
My 2 cents.
I wonder if one can't just sand the existing spar and iridite or some other surface condition instead.
My 2 cents.
"The pessimist complains about the wind; the optimist expects it to change; the realist adjusts the sails." - William Arthur Ward
jerecaustin.com
jerecaustin.com
as described .. painting can be a bear... I am thinking of just polishing it with a wheel and buffer ( it IS aluminum...) but I was told that the "dirt" on our spars is VERY important to its strength and longevity..this DIRT is a kind of natural anodization that gives the aluminum a protective coating...that said.. you can simply polish it but with a specail polish ( West aMarine has it) that does NOT remove this protective coating.... I have the product ( don't know the name ) but check teh directions of ANY polish and it will say ... but have not done the work yet...
C-26, Fixed Keel # 343
-
al the pal
- Posts: 82
- Joined: Mon Sep 28, 2009 9:59 am
- Location: Lake Perry, Kansas
1979 C-26
My Boat Overhaul Blog: http://alexadrift.wordpress.com/
My Boat Overhaul Blog: http://alexadrift.wordpress.com/
NYC, I'd hold off on the buffing until you talk to a welder or someone who knows aluminum. We have aluminum frames welded for us on a regular basis and the welders say that aluminum oxidises almost immediately. Once the electroplating or paint is removed from an aluminum surface it has to be preped and covered with something quickly. We have our frames powder coated and even the powder coater complains about working with aluminum.
Tranquil Chaos
I can't really speak to the painting part but I can speak volumes on the riveting part.
I am an Aerospace Machinist. I install and remove rivets, every day. Sometimes hundreds installed a singe day and occasionally in those hundreds I have to remove one or two defective ones.
Please, DO NOT USE STAINLESS RIVETS on your Aluminum mast! They will corrode out real fast and ugly. Big time Galvanic action will occur. If the metals touch, the Stainless rivets will eat the Aluminum mast starting on day one. Aluminum rivets will last for decades. You have Aluminum rivets now and they have been there for over 30 years with no degradation. Chrysler was not being cheap, they were doing it 100% right.
Rivet Removal.
* Drill out the head of the rivet with a drill that is 1 size smaller then the whole. (Very important, 1 size smaller, you don't want to damage the hole)
* Drill out the very dead center of the rivet.
* To start the drill out, place the tip of the NEW sharp drill bit on the center of the rivet.
1. Keep the power off the drill for now.
2. Grab the drill bit chuck with you free hand and rotate the drill while pressing it dead center on the rivet with the other hand on the drill motor. Keep doing this till you have what we call a drill start. A good sized dimple dead center in the rivet.
3. Now put the power back on the drill.
4. Pulse the power on the drill slowly. (Variable speed drill is best.) Cut your way through the rivet.
5. Stop drilling when you have just got the pointy tip of the drill below the surface of the metal you rivet is attached to. i.e. the point of the bit just below the head of the rivet where the shaft of the bit would just be entering the whole if the rivet were already out.
6. Get a center punch and a hammed. Place the head of the punch in your new hole and give it a whack or two the rivet head should pop right off and the rivet buck tail should pop right out the other side.
Note if the rivet does not come out after a couple whacks with the hammer on the center punch. Drill a little more and whack it again till it comes out.
This will work every time. But you must be 100% centered with that drill bit.
Thanks
Alan
It's a good life on the
Honu, 1976 C-22
My Chrysler Sailing Photos: http://s1297.beta.photobucket.com/user/ ... ry/Sailing
Honu, 1976 C-22
My Chrysler Sailing Photos: http://s1297.beta.photobucket.com/user/ ... ry/Sailing
-
al the pal
- Posts: 82
- Joined: Mon Sep 28, 2009 9:59 am
- Location: Lake Perry, Kansas
Thanks you for the advice, Alan. Again I am amazed at the wealth of knowledge contained within this group.
Tonight I was reading in Don Casey's "This Old Boat" about caring for a mast. He said that you may want to paint a mast if it is oxidizing. Otherwise he recommended waxing the mast whenever you have it horizontal. The rivets for the upper shrouds look really strong and so I am thinking of leaving them in place and waxing the mast if I get that ambitious this spring. Painting the mast does not sound like it is needed for me at this point as it looks good so far.
Tonight I was reading in Don Casey's "This Old Boat" about caring for a mast. He said that you may want to paint a mast if it is oxidizing. Otherwise he recommended waxing the mast whenever you have it horizontal. The rivets for the upper shrouds look really strong and so I am thinking of leaving them in place and waxing the mast if I get that ambitious this spring. Painting the mast does not sound like it is needed for me at this point as it looks good so far.
1979 C-26
My Boat Overhaul Blog: http://alexadrift.wordpress.com/
My Boat Overhaul Blog: http://alexadrift.wordpress.com/